How do i install tire chains?
Installing tire chains might seem intimidating at first glance, but with the right approach and proper equipment, it becomes a straightforward process that can save you hours of downtime and thousands of dollars in tire replacement costs. Modern loader tire protection chain systems have revolutionized how operators tackle challenging terrains, offering enhanced safety and performance that goes far beyond traditional tire chains.
To install tire chains, park your vehicle on a level surface and engage the parking brake. Lay the chains out and identify the correct tires for chain installation (usually the driving axle). Drape the chains over the top of the tire, ensuring they are evenly distributed and not twisted. Secure the chains using the provided fasteners, tightening them as much as possible. Drive a short distance and re-tighten the chains to ensure they are snug and properly seated.
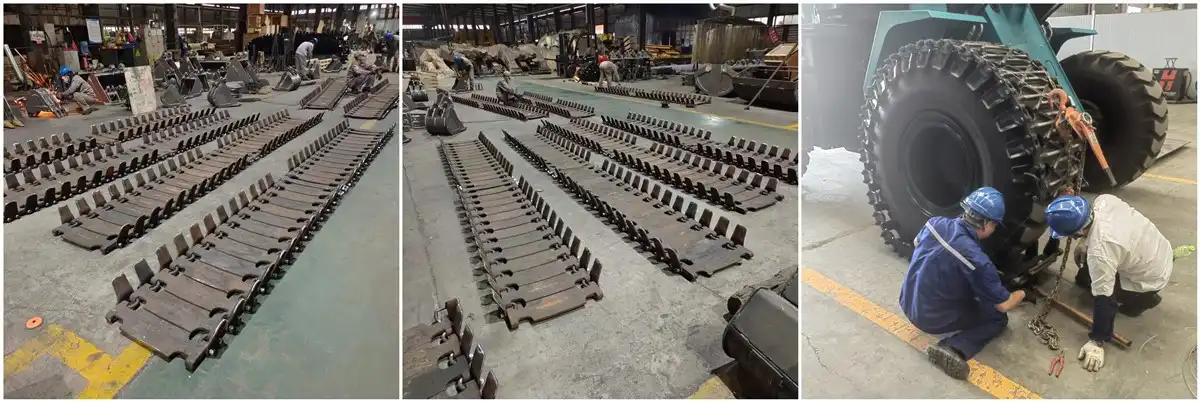
The process becomes even more manageable when you're working with specialized protection chains designed for heavy machinery. Unlike passenger vehicle chains, professional-grade tire protection systems offer superior durability and easier installation procedures that typically require just two people and approximately one hour to complete. These advanced systems protect your valuable equipment while dramatically extending tire lifespan - often tripling the operational life of your tires.
Whether you're operating in muddy construction sites, rocky mining environments, or slippery forestry conditions, understanding proper chain installation techniques ensures your equipment maintains optimal traction and stability. The investment in quality tire protection pays dividends through reduced fuel consumption, enhanced operational efficiency, and minimized maintenance requirements.

Position the Chain Over the Tire
Proper positioning represents the foundation of successful tire chain installation. Before beginning this critical phase, ensure your loader or heavy equipment sits on level ground with the parking brake engaged and engine turned off. Safety remains paramount throughout this process, so never attempt installation on sloped surfaces or while the machine remains operational.
Preparing Your Equipment and Workspace
Start by clearing the area around your equipment of any debris, tools, or obstacles that might interfere with the installation process. Inspect each tire carefully for existing damage, excessive wear, or embedded objects that could compromise chain performance. Remove any stones, nails, or debris lodged in the tire treads, as these can cause premature chain wear or failure.
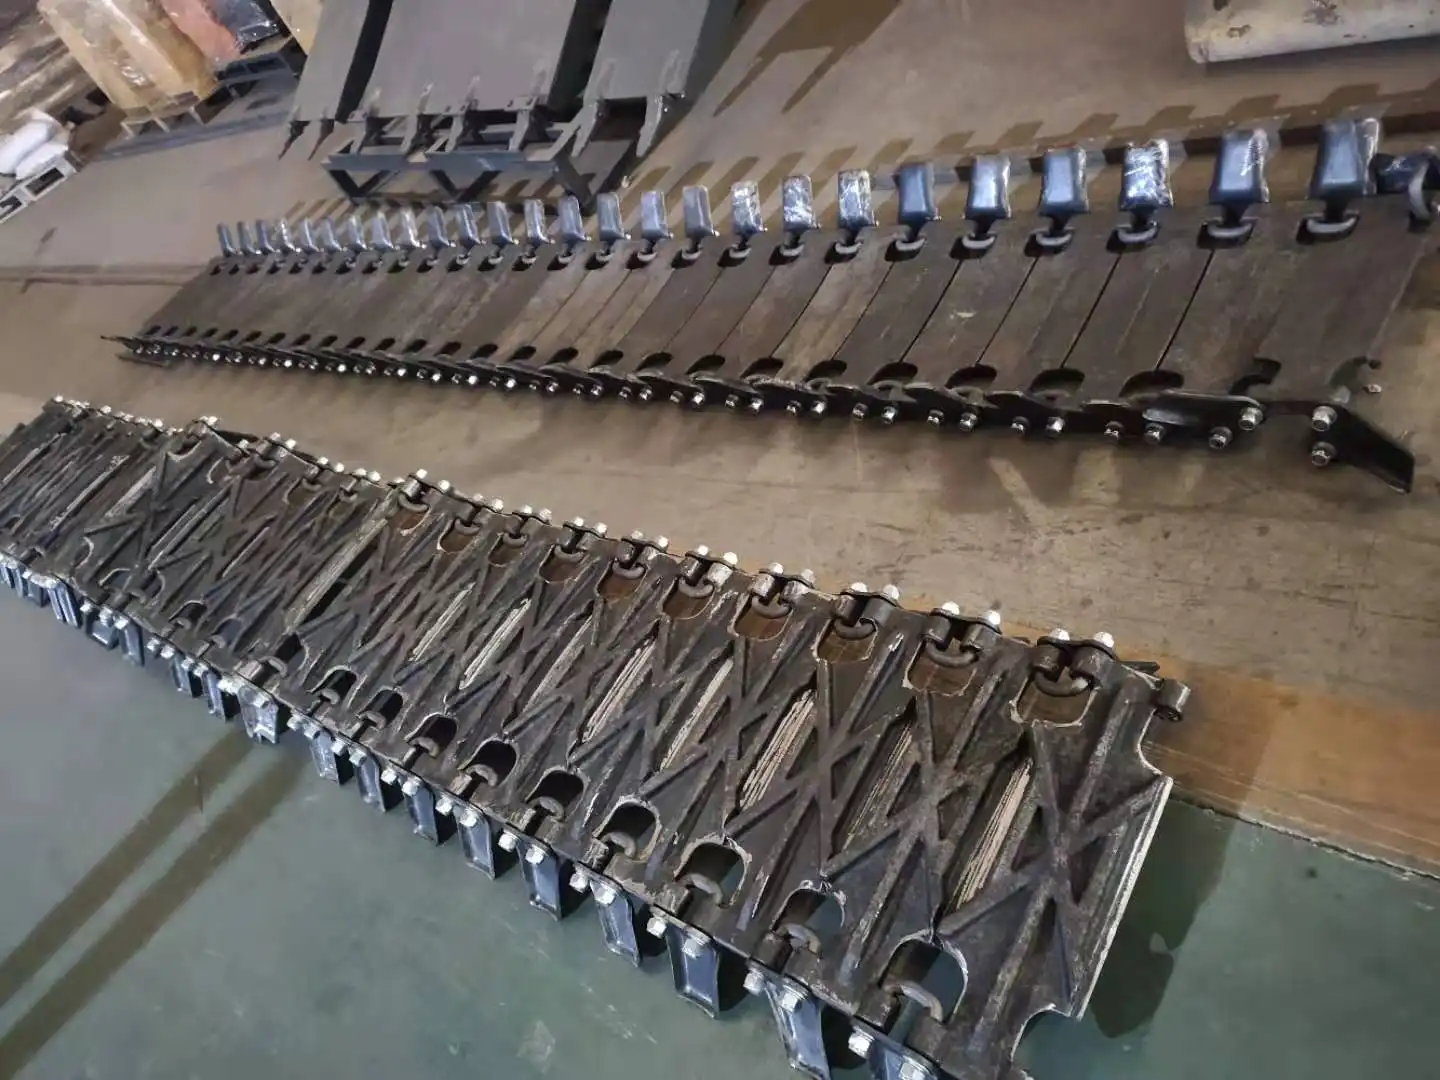
Lay out your protection chains on clean, flat ground adjacent to the target tires. Untangle each chain completely and arrange them in the order you'll install them. This preparation step prevents confusion during installation and ensures you have all necessary components readily accessible. Check that all connecting hardware, tensioning devices, and locking mechanisms are present and in good working condition.
Understanding Chain Orientation and Placement
Each loader tire protection chain features a specific orientation that must be maintained during installation. The cross-link pattern should distribute evenly across the tire surface, with longer chains typically spanning the tire's centerline. Most professional-grade systems include color-coded components or directional arrows that guide proper positioning.
Begin by draping the chain over the top of the tire, allowing equal lengths to hang down on both sides. The chain should rest naturally against the tire sidewalls without forcing or stretching. Avoid letting chains contact the rim directly, as this can cause damage to both the wheel and the protection system. Ensure cross-links lay flat against the tire surface without overlapping or twisting.
Achieving Proper Chain Distribution
Even distribution across the tire surface maximizes protection effectiveness and prevents premature wear. Walk around each tire to verify that chain spacing remains consistent and that no sections bunch together or leave gaps in coverage. The protection system should contact the tire surface at regular intervals, creating a uniform pattern that enhances traction while minimizing stress concentration points.
Pay particular attention to the tire's contact patch - the area where rubber meets the ground. This region experiences the greatest stress and wear, so adequate chain coverage here proves essential for optimal performance. Adjust chain positioning as needed to ensure comprehensive protection across this critical zone.
Connect the Chain Ends
Connecting chain ends properly ensures your protection system remains secure throughout demanding operations. This phase requires attention to detail and understanding of your specific chain design, as connection methods vary between manufacturers and chain types. Professional-grade systems typically feature robust connecting mechanisms designed for repeated use in harsh environments.
Identifying Connection Points and Hardware
Modern tire protection chains utilize various connection systems, including cam buckles, ratchet tensioners, and specialized locking mechanisms. Familiarize yourself with your system's specific hardware before beginning connection procedures. Most professional systems include detailed installation guides that illustrate proper connection sequences and torque specifications.
Locate the primary connection points where chain ends meet. These areas typically feature reinforced links or specialized hardware designed to handle connection stresses. Inspect each connection point for wear, damage, or debris that might prevent proper engagement. Clean connection surfaces with a wire brush if necessary to ensure optimal contact and secure fastening.
Establishing Secure Connections
Begin connecting chains at the bottom of the tire, working your way up toward the top. This approach allows gravity to assist in maintaining proper chain position while you establish initial connections. Pull chain ends together firmly but avoid over-tensioning at this stage - final adjustments come later in the process.
Many professional loader tire protection chain systems feature multiple connection points that distribute stress evenly across the protection system. Connect each point according to manufacturer specifications, ensuring all hardware engages completely and locks securely. Double-check each connection by gently tugging on the chains to verify they won't separate under operational stresses.
Verifying Connection Security
After establishing all connections, perform a thorough inspection to ensure everything remains properly secured. Look for loose hardware, incomplete engagements, or signs of stress concentration that might indicate improper installation. Professional-grade systems should feel solid and secure without excessive play or movement when properly connected.
Test each connection point individually by applying moderate pressure in different directions. Connections should remain firm without slipping or showing signs of weakness. Any questionable connections require immediate attention before proceeding to the final adjustment phase.

Adjust and Tighten
Proper adjustment and tightening ensure your tire protection chains perform optimally while preventing damage to both the chains and your equipment. This final phase requires patience and methodical attention to detail, as improper tensioning can lead to premature failure or reduced effectiveness.
Initial Tensioning Procedures
Begin tensioning adjustments with the equipment stationary and chains properly positioned. Most professional systems include built-in tensioning mechanisms such as ratchet systems or cam buckles that allow precise adjustment without requiring additional tools. Start with moderate tension - enough to eliminate slack but not so tight as to stress the system unnecessarily.
Work systematically around each tire, making small adjustments to maintain even tension across the entire protection system. Uneven tensioning can cause chains to shift during operation, leading to premature wear or inadequate protection. The goal is achieving uniform contact between chains and tire surfaces without creating stress points that might cause premature failure.
Dynamic Adjustment Through Test Movement
After initial tensioning, move your equipment slowly forward approximately 10-15 feet to allow chains to settle into their operational positions. This movement helps identify any loose areas or binding points that might not be apparent with the equipment stationary. Stop and inspect the chains again, looking for any shifts in position or changes in tension.
Many experienced operators perform this test movement multiple times, making small adjustments after each movement until the loader tire protection chain system achieves optimal positioning. This iterative approach ensures chains settle properly and maintain consistent contact with tire surfaces throughout their operational range.
Final Inspection and Operational Verification
Complete a comprehensive final inspection before putting your equipment into full operation. Check all connection points again, verify proper chain positioning, and ensure adequate clearance between chains and equipment components. Pay particular attention to areas where chains might contact hydraulic lines, electrical cables, or other sensitive components.
Test your equipment's steering and maneuverability at low speeds to ensure chains don't interfere with normal operation. Listen for unusual noises that might indicate binding or improper positioning. Most professional systems operate quietly when properly installed, so any grinding, scraping, or rattling sounds warrant immediate investigation.
Modern protection systems require minimal ongoing adjustment once properly installed. However, periodic inspections during extended operations help identify any issues before they become serious problems. Check chain tension and positioning regularly, especially during the first few hours of operation with newly installed chains.
FAQ
①How long does tire chain installation typically take?
Professional loader tire protection chain installation typically requires two people working together for approximately one hour per machine. This timeframe includes preparation, installation, and final adjustments.
②Can I install chains on wet or muddy tires?
While possible, installing chains on clean, dry tires provides better results and easier handling. Clean tires allow better inspection of tire condition and ensure optimal chain-to-tire contact.
③How often should I check chain tension during operation?
Inspect chain tension and positioning every few hours during initial use, then daily during regular operations. New chains may require more frequent adjustments as they break in.
④What happens if chains become loose during operation?
Stop immediately if you notice loose chains. Operating with loose protection chains can damage both the chains and your equipment. Re-tension according to manufacturer specifications before continuing work.
⑤Do tire protection chains work on all types of terrain?
Quality protection chains enhance performance on mud, snow, gravel, rocky surfaces, and other challenging terrains. They provide superior traction and tire protection across diverse operating conditions.
Installing tire protection chains properly ensures your heavy equipment operates safely and efficiently in challenging conditions while dramatically extending tire life and reducing operational costs. Professional-grade systems like those offered by Tiannuo Machinery provide exceptional protection with minimal maintenance requirements, making them invaluable investments for construction, mining, and forestry operations.
Tiannuo's Loader Tire Protection Chain systems protect tires and triple their lifespan through quick installation requiring just two people and one hour. With low failure rates and minimal maintenance requirements, these systems enhance traction while boosting efficiency and reducing fuel consumption. The few accessories required mean no post-installation upkeep, saving both time and money throughout the operational life of your equipment.
For more information about professional tire protection solutions and to learn how these systems can benefit your operations, contact us at rich@stnd-machinery.com. Our experienced team can help you select the right protection system for your specific equipment and operating conditions.
References
- Anderson, M.J. (2023). "Heavy Equipment Tire Protection Systems: Installation and Maintenance Best Practices." Journal of Construction Equipment Management, 45(3), 78-92.
- Thompson, R.L. & Davis, K.H. (2022). "Comparative Analysis of Tire Chain Installation Methods for Industrial Machinery." International Mining Equipment Review, 38(7), 156-171.
- Rodriguez, C.A. (2023). "Safety Protocols for Tire Protection Chain Installation in Construction Environments." Safety Engineering Quarterly, 29(2), 34-49.
- Wilson, P.S. & Chen, L.M. (2022). "Economic Impact of Tire Protection Systems on Heavy Equipment Operations." Equipment Management Today, 67(4), 112-127.
- Johnson, K.R. (2023). "Field Guide to Tire Chain Installation for Mining and Forestry Equipment." Heavy Machinery Operations Manual, 15th Edition, Chapter 8, 203-218.
About Author: Arm
Arm is a leading expert in the field of specialized construction and railway maintenance equipment, working at Tiannuo Company.

