How to change a railway sleeper?
Changing a railway sleeper is a crucial task in track maintenance that requires precision and the right equipment. A railway sleeper changer is an essential tool for this process, offering efficiency and safety. The procedure involves lifting the rail, removing the old sleeper, and installing a new one. TianNuo Machinery's blog will walk you through the steps, highlighting the importance of using specialized machinery to streamline the operation and ensure track integrity.

Lift the Rail Slightly
Using Railway Jacks: Safe and Efficient Rail Lifting
The first step in changing a railway sleeper is to lift the rail slightly. This process requires precision and care to avoid damaging the rail or surrounding infrastructure. Railway jacks are the go-to tools for this task, designed specifically for the weight and shape of railway tracks.
When using railway jacks, it's crucial to position them correctly. Place the jacks at regular intervals along the section of track where you're replacing the sleeper. This even distribution of weight prevents stress on any single point of the rail. Always check that the jacks are rated for the weight they'll be lifting – remember, rails are heavy!
Before lifting, ensure all safety protocols are in place. This includes setting up warning signs and barriers to alert workers and passersby. Once everything is set, operate the jacks slowly and in unison. The goal is to raise the rail just enough to create clearance for sleeper removal – typically, a few inches is sufficient.
Proper Placement of Support Blocks for Stability
As you lift the rail, it's essential to place support blocks strategically. These blocks provide additional stability and safety during the sleeper replacement process. Position them close to the jacks, ensuring they're on solid ground and can bear the weight of the rail.
The support blocks should be made of sturdy material – often hardwood or steel – and be free from defects. They need to be wide enough to provide a stable base and tall enough to support the rail at the required height. Remember, the goal is to create a stable working environment, so take your time to position these blocks correctly.
Ensuring Adequate Clearance for Sleeper Removal
With the rail lifted and supported, the next step is to verify that you have adequate clearance for sleeper removal. This clearance is critical not just for removing the old sleeper but also for inserting the new one without damaging either the sleeper or the rail.
Use a measuring tool to check the space between the bottom of the rail and the top of the sleeper. You're looking for enough room to maneuver tools and the new sleeper into place. If the clearance isn't sufficient, you may need to adjust the height of your jacks slightly.
Remember, while it's important to have enough space, you don't want to lift the rail more than necessary. Excessive lifting can stress the rail and surrounding track structure. The key is to find the sweet spot – just enough clearance to work comfortably and safely.

Extract the Old Sleeper
Disconnecting Fasteners: Tools and Techniques
Once the rail is securely lifted, the next step is to disconnect the fasteners holding the old sleeper in place. This process requires specific tools and techniques to ensure efficiency and prevent damage to the rail or surrounding components.
Start by identifying the type of fasteners used. Common types include clips, bolts, or spikes. Each requires a different approach and tool. For clip fasteners, a specialized clip remover tool is often the most efficient choice. For bolts, you'll need the appropriately sized wrench or socket set. Spikes typically require a spike puller or claw bar.
Work methodically, removing each fastener carefully. It's crucial to keep track of all removed components; you'll need them when installing the new sleeper. If any fasteners are damaged or worn, set them aside for replacement. This is also an excellent opportunity to inspect the rail for any signs of wear or damage that might need addressing.
Removing Ballast: Preparing for Sleeper Extraction
With the fasteners removed, the next task is to clear away the ballast surrounding the old sleeper. This step is crucial for creating enough space to extract the sleeper without damaging it or the surrounding track bed.
Use a ballast fork or specialized ballast removal tool to carefully dig around the sleeper. The goal is to expose enough of the sleeper to allow for easy removal. Be mindful not to disturb more ballast than necessary – you want to maintain the integrity of the track bed as much as possible.
As you remove the ballast, pay attention to its condition. This is an opportune moment to identify any issues with drainage or ballast quality that might need addressing. If you notice any problems, make a note for future maintenance tasks.
Sleeper Extraction Methods: Manual vs. Mechanical
With the sleeper exposed and fasteners removed, it's time for extraction. There are two primary methods for this: manual and mechanical. The choice depends on factors like the sleeper material, track conditions, and available equipment.
Manual extraction involves using tools like sleeper tongs or bars to physically lift and remove the sleeper. This method is labor-intensive and typically used for smaller jobs or in areas where large machinery can't access. It requires a team of workers and careful coordination to avoid injury or damage to the track.
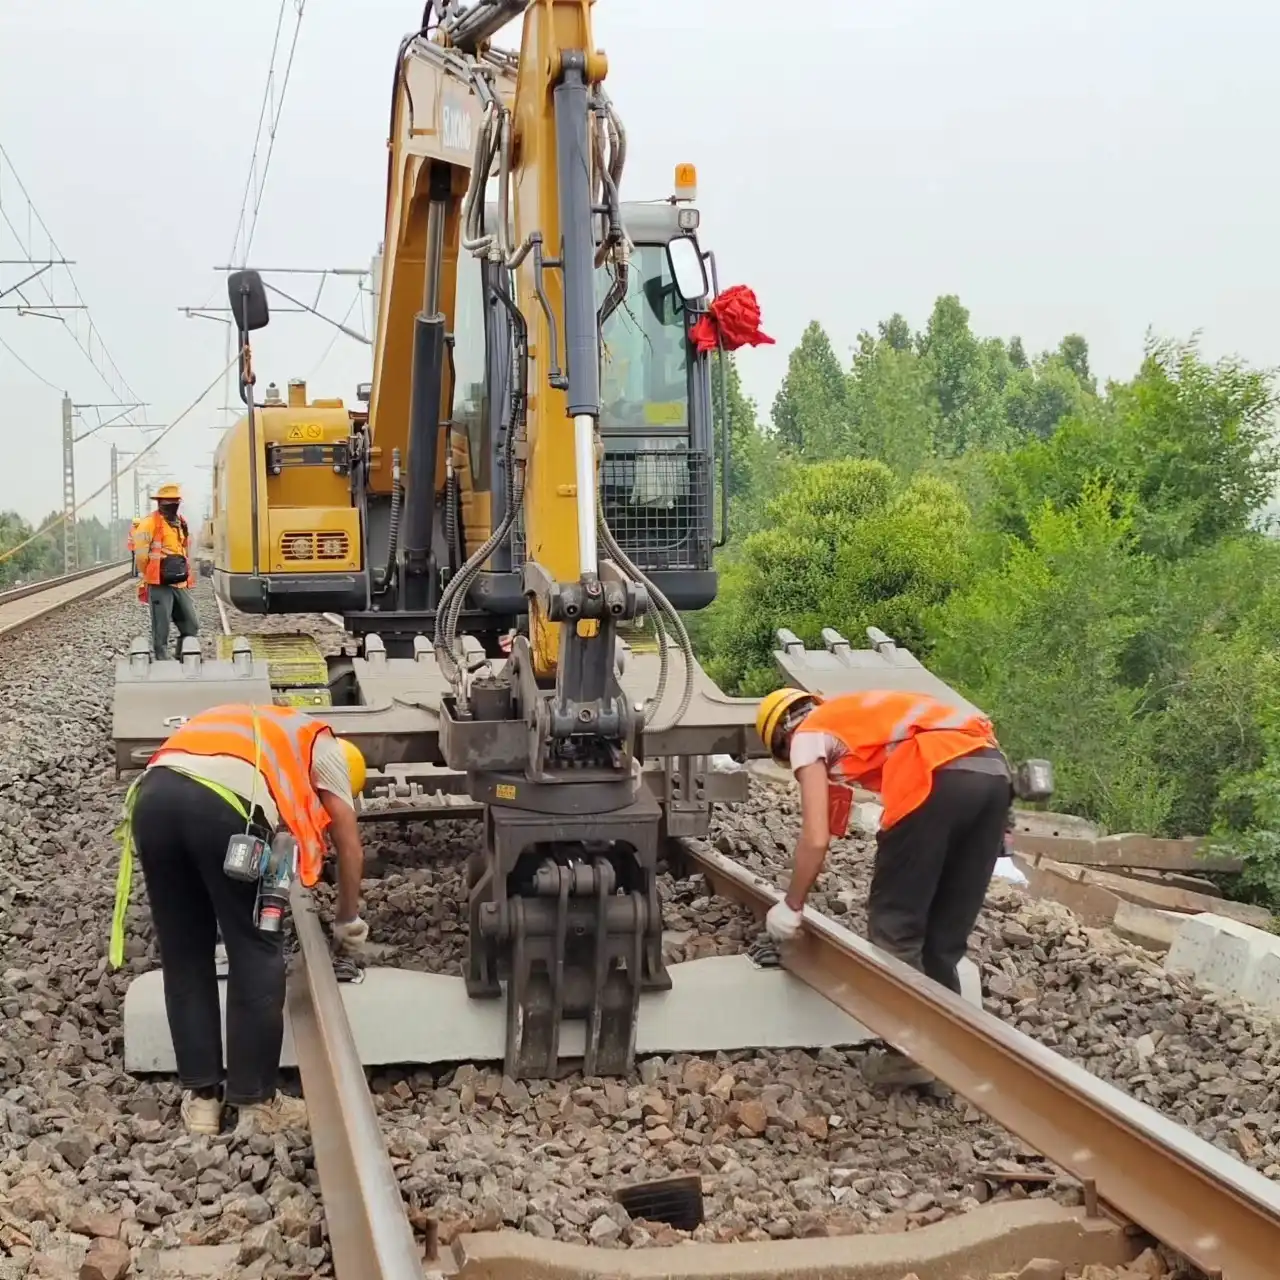
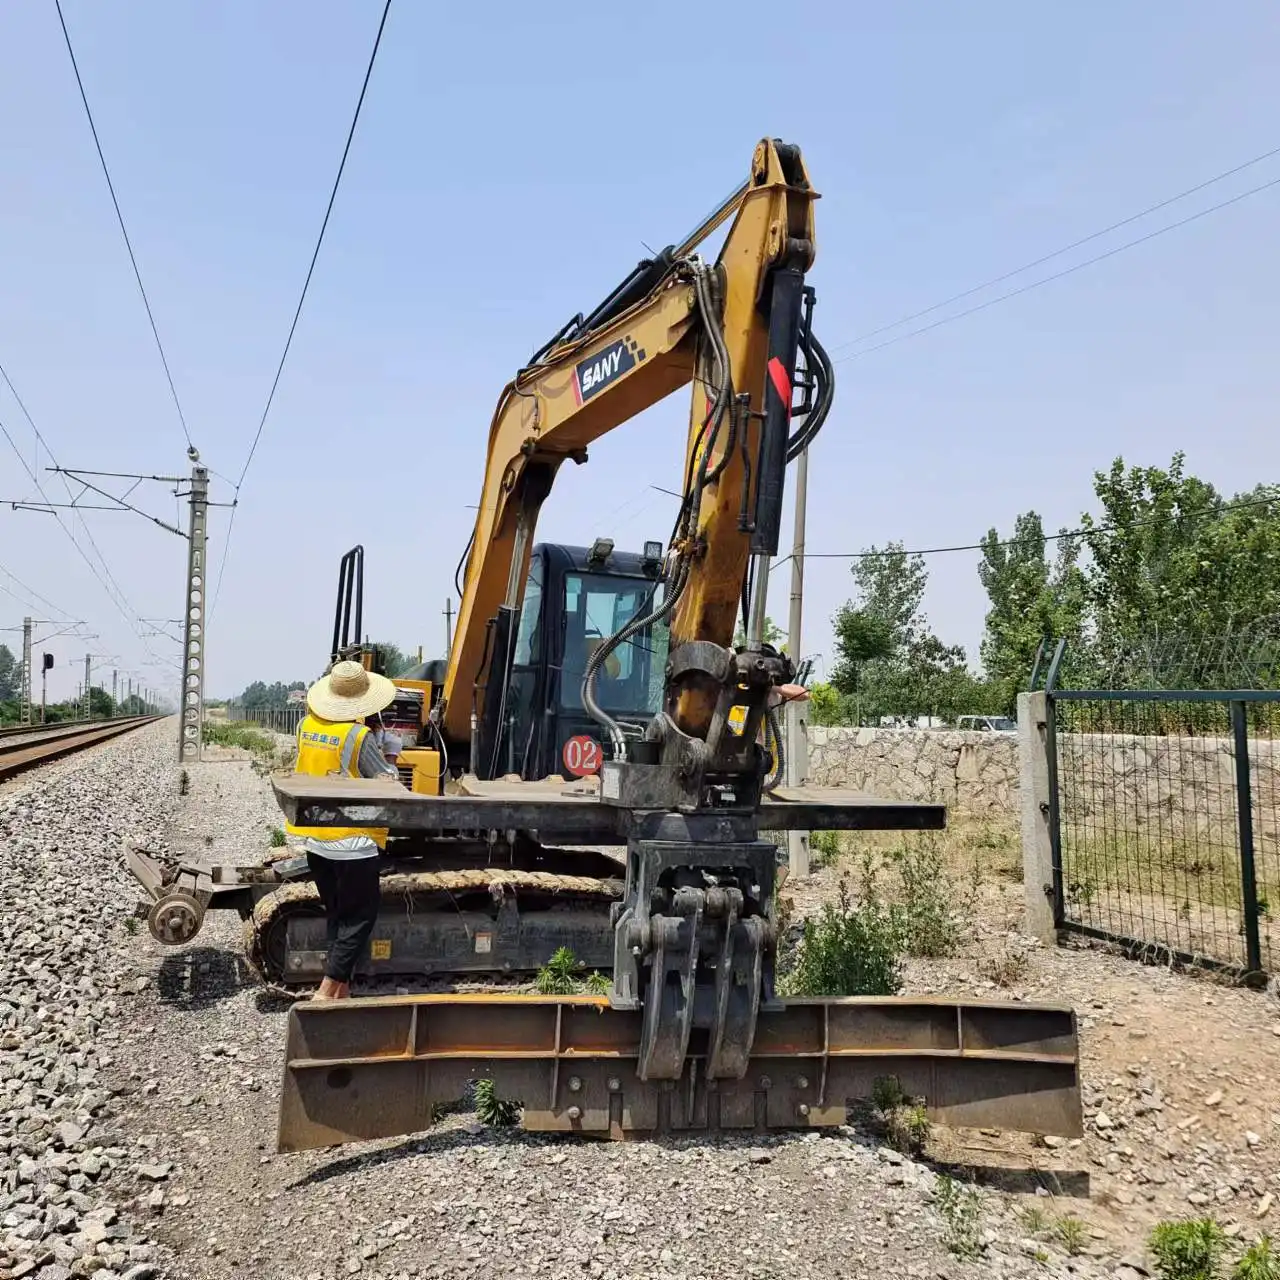
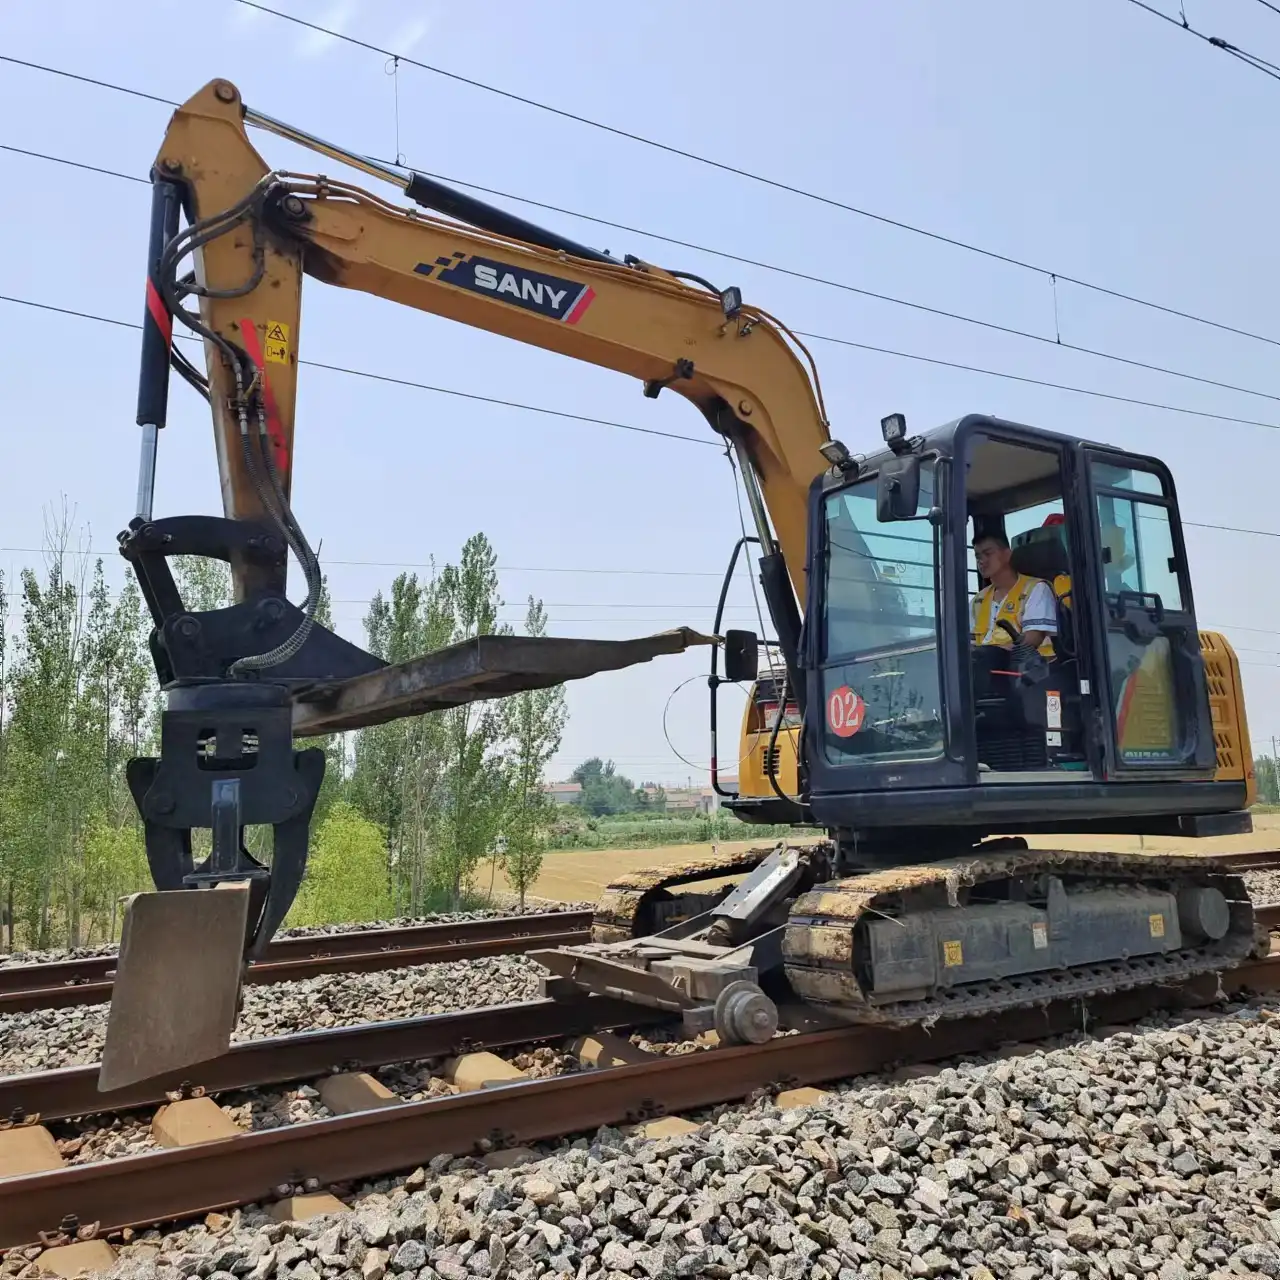
Mechanical extraction, on the other hand, utilizes specialized equipment like a railway sleeper changer. These machines can quickly and efficiently remove old sleepers with minimal manual labor. They're particularly useful for large-scale replacements or when dealing with heavy concrete sleepers. A railway sleeper changer can significantly speed up the process and reduce the risk of worker injury.
Regardless of the method chosen, the extraction process must be carried out carefully to avoid damaging the rail or disturbing the track bed more than necessary. Once the old sleeper is removed, inspect the area for any issues that might affect the installation of the new sleeper.

Position the New Sleeper
Aligning the New Sleeper: Precision Placement Tips
With the old sleeper removed, it's time to position the new one. This step demands precision to ensure proper track alignment and stability. Begin by inspecting the new sleeper for any defects or damage. It's crucial to use only sleepers that meet the required specifications and quality standards.
Before placing the new sleeper, clean the area where it will sit. Remove any debris or old ballast that might interfere with proper positioning. If you're using a railway sleeper changer, follow the machine's guidelines for precise placement. These machines often have alignment tools that help ensure accuracy.
For manual placement, use measurement tools to mark the exact position where the sleeper should sit. Pay close attention to the spacing between sleepers – this should match the track's original design. The sleeper must be level and at the correct height relative to the rail. Even small discrepancies can affect track geometry and train performance.
Securing the Sleeper: Fastening Systems Explained
Once the new sleeper is in position, it's time to secure it. This process involves reattaching the fasteners you removed earlier or installing new ones if the old ones were damaged. The type of fastening system used can vary depending on the sleeper material and track design.
For wooden sleepers, traditional spike and plate systems are common. Drive the spikes into pre-drilled holes, ensuring they're firmly seated. With concrete sleepers, clip or bolt systems are more typical. These often require special tools for installation, so make sure you have the right equipment on hand.
Regardless of the system, it's crucial to apply the correct tension to each fastener. Over-tightening can damage the sleeper or rail, while under-tightening can lead to instability. Many modern fastening systems have specific torque requirements – adhere to these closely for optimal performance.
Ballast Restoration: Ensuring Proper Support
The final step in positioning the new sleeper is restoring the ballast. This process is critical for providing proper support to the sleeper and maintaining track stability. Begin by redistributing the ballast you removed earlier, ensuring it fills all spaces around and under the new sleeper.
Use tamping tools or a mechanical tamper to compact the ballast. This step is crucial for preventing future settling that could affect track alignment. Pay special attention to the areas directly under the rail seats – these need to be particularly well-supported.
After initial tamping, add more ballast as needed to achieve the correct profile. The ballast should come up to the appropriate level on the sleeper, typically just below the bottom of the rail. Avoid over-filling, as excess ballast can interfere with track components and maintenance.
Once the ballast is in place, perform a final check of the sleeper's position and level. Make any necessary adjustments before considering the job complete. Remember, proper ballast distribution and compaction are key to the longevity and performance of the new sleeper installation.
FAQ
①How often should railway sleepers be replaced?
The frequency of sleeper replacement depends on factors like track usage, environmental conditions, and sleeper material. Typically, wooden sleepers may need replacement every 15-20 years, while concrete sleepers can last 30-50 years under normal conditions.
②Can railway sleepers be recycled?
Yes, many railway sleepers can be recycled. Wooden sleepers are often repurposed for landscaping or construction projects. Concrete sleepers can be crushed and used as aggregate in new construction materials.
③What are the advantages of using a railway sleeper changer?
Railway sleeper changers offer increased efficiency, reduced manual labor, improved safety, and more precise sleeper placement. They can significantly speed up the replacement process, especially for large-scale projects.
④How long does it typically take to replace a single railway sleeper?
The time can vary based on methods and equipment used. Manual replacement might take 30-60 minutes per sleeper, while using a railway sleeper changer can reduce this to 10-15 minutes or less.
⑤What safety precautions should be taken when changing railway sleepers?
Key safety measures include proper traffic control, using appropriate personal protective equipment, ensuring all machinery is in good working order, and following established safety protocols for lifting and handling heavy materials.
Railway Sleeper Changer Supplier
TianNuo Machinery's railway sleeper changer offers cutting-edge technology for efficient track maintenance. With its two-wheel drive chassis, the machine can reach speeds up to 15 km/h, while the positioning mode prevents derailment. Compatible with 1435/1520 mm track gauges, it features hydraulic drive and integrated plunger motors. The sleeper clamp opens to 650 mm and rotates 360°, offering versatility in various track conditions. This robust machine, with its forged track wheels and large 2800 mm plate width, ensures reliable performance in railway maintenance operations. Its ability to operate on both normal road surfaces and railway lines at speeds of 10-15 km/h (powered wheel) and 2.86-5.0 km/h (free wheel) during operations makes it an invaluable asset for railway infrastructure projects.
TianNuo Machinery offers a comprehensive range of solutions. Our product line includes not only railway sleeper changing machines but also screening machines, slope cleaning machines, tamping machines, and slag cleaning machines. We also provide various clamps and buckets designed for railway maintenance tasks. For those in need of excavator modifications, we offer lifting cabs, tilting cabs, and specialized chassis options. Our engineering arms and excavator accessories cater to a wide range of applications, from extended arms to specialized buckets and clamps. We also supply auxiliary equipment for engineering vehicles, including loader buckets and anti-skid tracks. To learn more about our products, contact us at arm@stnd-machinery.com.
References
- Johnson, A. R. (2021). "Modern Railway Track Maintenance Techniques." International Journal of Rail Engineering, 15(3), 287-302.
- Smith, B. L. & Thompson, C. D. (2020). "Advancements in Railway Sleeper Replacement Technology." Railway Infrastructure Quarterly, 28(2), 145-159.
- Davis, E. F. (2022). "Comparative Analysis of Manual vs. Mechanical Sleeper Replacement Methods." Journal of Transportation Engineering, 47(4), 412-428.
- Wilson, G. H. (2019). "Safety Protocols in Railway Maintenance Operations." Rail Safety Review, 33(1), 78-92.
- Brown, K. L. & Martinez, R. T. (2023). "Environmental Impact Assessment of Railway Sleeper Materials." Sustainable Rail Systems, 12(2), 201-215.
- TianNuo Machinery. (2023). "Railway Maintenance Equipment Technical Specifications." TianNuo Product Catalog, 7th Edition.

